There are many ways of formatting a thumb drive in Linux. This tutorial will outline the primary method I use.
Identify the disk
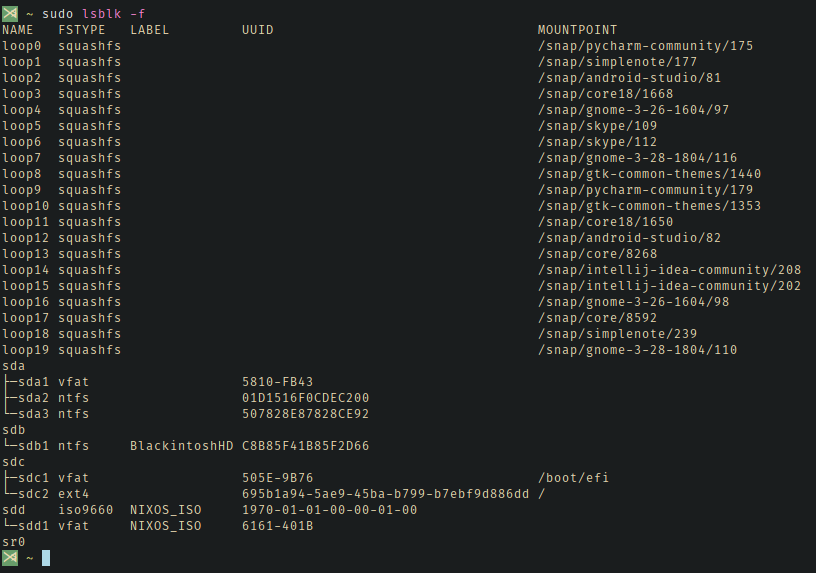
- Without the disk plugged in, run
sudo lsblk -fand observe the output. - Plug in the disk. Run
sudo lsblk -fagain. This time you should see a new entry or entries. This is your disk. You can also use the listed size to confirm it is the correct device.
Partition the disk
I generally use cgdisk for this portion as it is:
- User friendly enough to a newbie that they will likely not need to refer to the man page.
- Supports GPT partitions.
If you are curious about the differences between GPT and MBR, see this section of the Arch Wiki.
cgdisk is part of the gdisk package in Ubuntu. It can be installed with sudo apt install gdisk.
Note that the actions we are going to take in cgdisk will delete any data currently located on your volume.
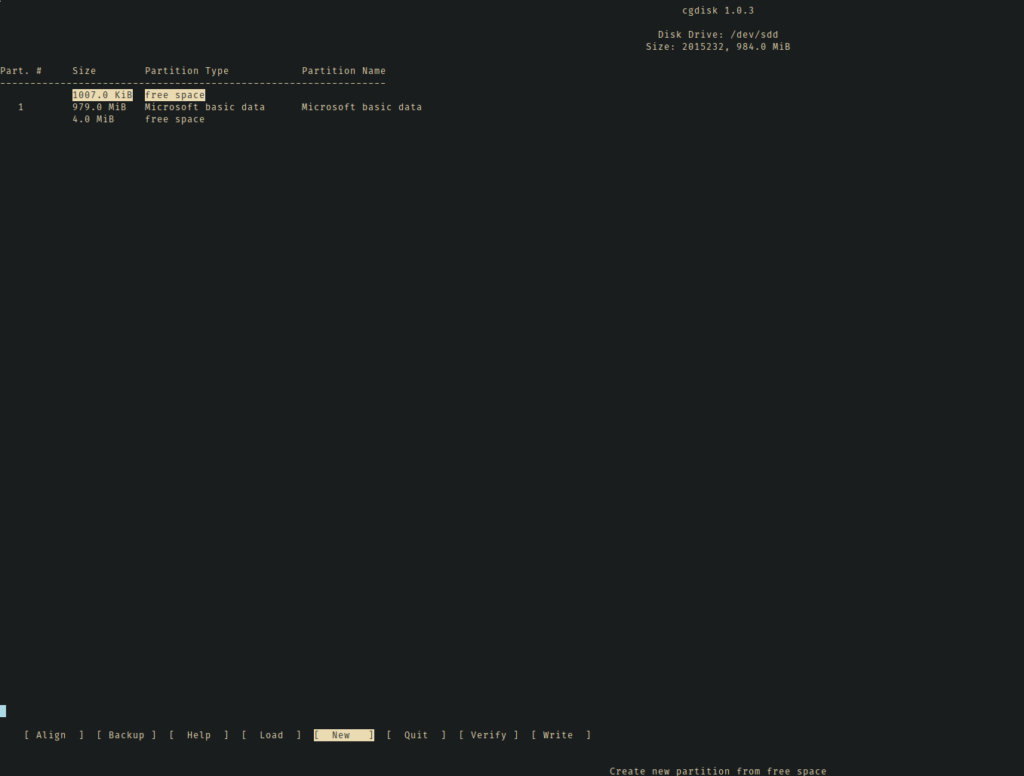
- Run
cgdisk /dev/sdxx(replace the x’s with the correct device id) - Delete any existing partitions by selecting them and then choosing Delete.
- Select the free space in the UI and then choose New to create a new partition.
- Select Write to finalize your changes and write them to disk.
Format the partition
We’ll need to create a filesystem on our brand new partition. In this case I’ll be creating a FAT32 partition for the drive as it is intended to be used with Mac, Windows, and Linux.
I’m using the dosfstools package in my Ubuntu based distro. If you don’t have it, install with sudo apt install dosfstools.
Then run sudo mkfs.fat -F 32 /dev/sdx (replace the x’s with the correct device id)
Label the drive
Finally, we have to give the drive a label. This is the name that will show up for the device. fatlabel is part of the dosfstools package.
The syntax is sudo fatlabel /dev/sdxx (replace the x’s with the correct device id)