Why?
There were a couple of motivations and use cases for putting this together.
- Needed a better way of triggering backing track playback when performing with my band Big Time Kill
- Wanted a compact but powerful synth that could be used for performances or jamming
- Stand alone guitar pedal board/amp modeling
- Something that felt like a stand-alone piece of production hardware
But an iPad can do all of this
Yes, it can do all of this and has a very rich audio production ecosystem. However:
- An iPad is more expensive
- I like to tinker and build things
- I wanted it to look cool
- There are lots of USB ports and GPIO pins which allow me to add more MIDI interfaces or maybe even trigger some lights (via GPIO)
Did you just super glued/velcro off the shelf parts together?
Yes.
What does it do?
Here are some video examples. A lot of these were filmed before the whole unit was built so just the core and the software are featured in many of these.
Parts BOM
Note that some items are no longer available or the prices have changed. I’ve listed the prices I paid for particular items at the time of purchase.
| Item | Price |
| Raspberry Pi 4 Model B – 2 GB RAM | $35 |
| Official Raspberry Pi Power Supply 5.1V 3A (can be added via checkbox when purchasing the Pi) | $7.95 |
| Raspberry Pi Official 7 Inch Touch Screen for Raspberry Pi 4 | $68.99 |
| NeeGo Raspberry Pi 4 Screen Case | $24.99 |
| Presonus Audiobox 2×2 (off of Reverb.com) | $70.00 |
| SanDisk 64 GB Micro SD Card | $14.79 |
| Charmast 26800 Power Bank | $42.99 |
| Tablet Stand | $14.38 |
| Mechanical Number Pad | $16.99 |
| Geekworm Embeded Heatsink with Fan | $9.99 |
Software
Patchbox OS was used as the operating system. It comes out of the box optimized for low-latency audio playback.
MODEP comes installed with Patchbox OS and is a community-based MOD DUO emulator.
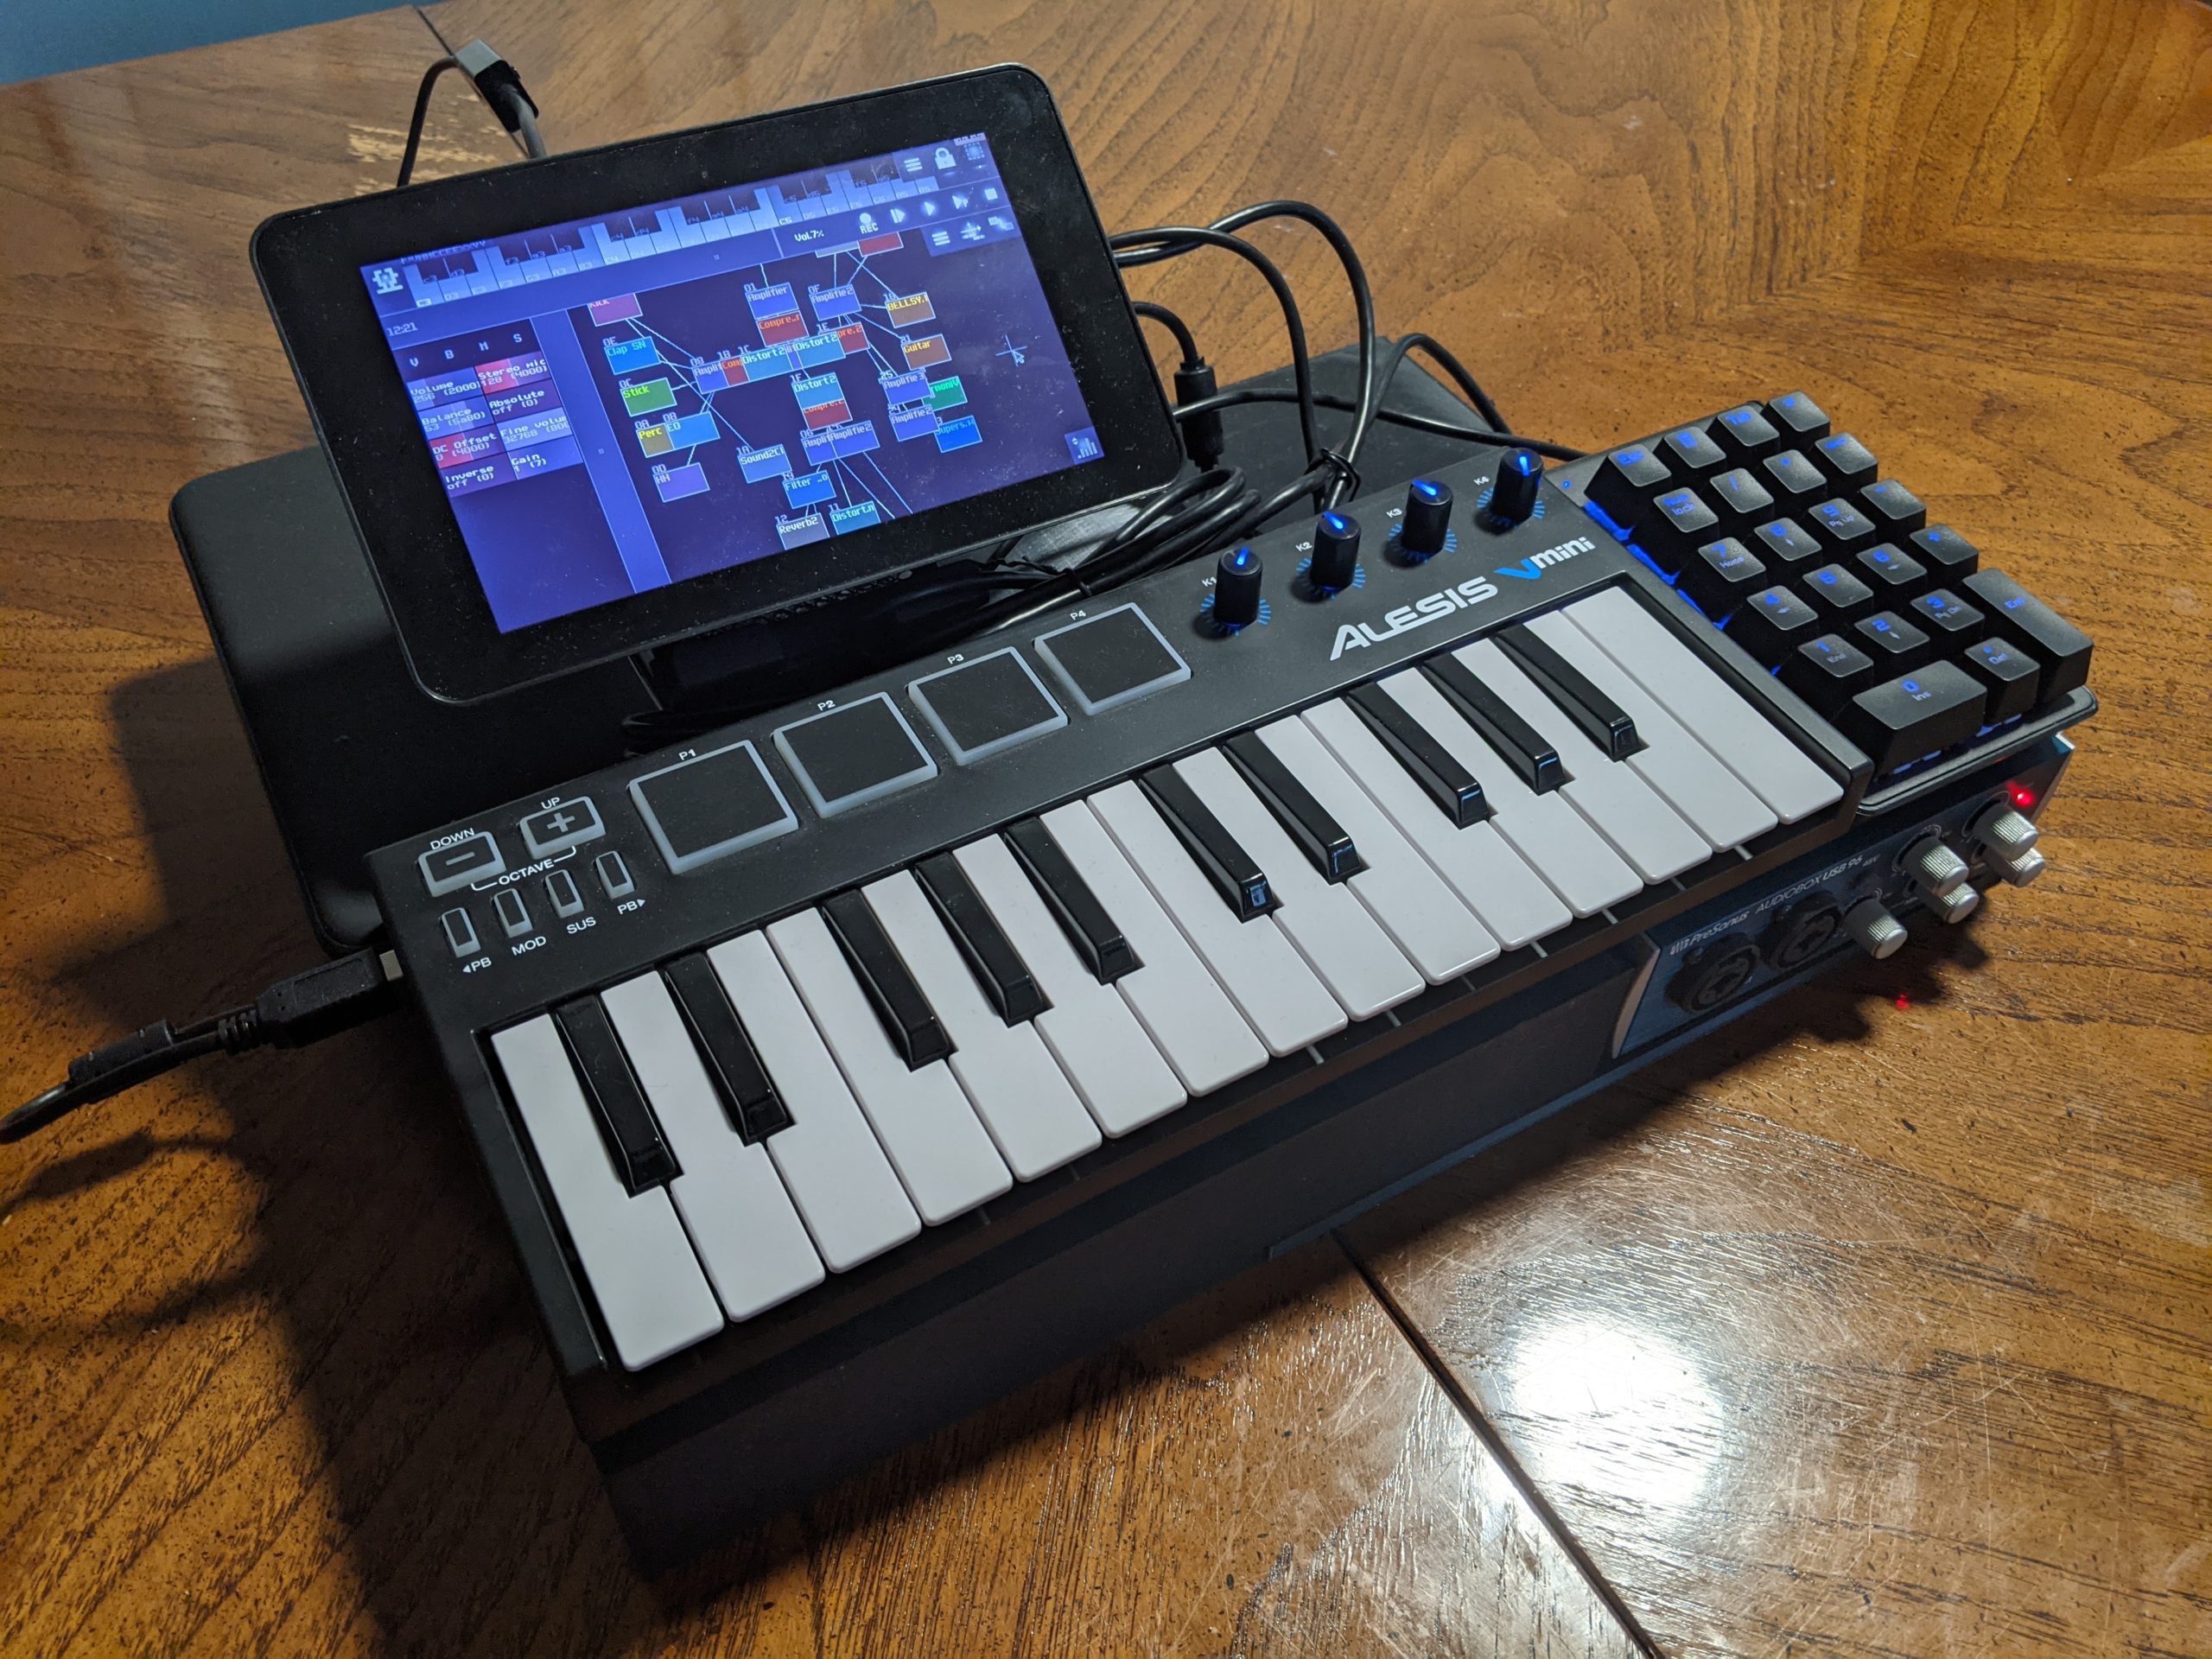
SunVox is a modular music tracker that allows me to design synthesizers, produce full tracks, or process incoming audio signals.
In order to run SunVox properly on the Pi you will need to install SDL by running:
sudo apt install libsdl2-2.0-0 libsdl2-devAt this point it will run but the UI will have terrible FPS. To resolve this edit ~/.config/SunVox/sunvox_config.ini and add the softrender option to the file.
Design
The form factor was inspired and derived from the aesthetics of cyberdecks. Cyberdeck.cafe and the cyberdeck subreddit served as sources of inspiration.
The first step was to order all the parts. Once they arrived everything was assembled and tested. After verifying it worked I began taking measurements of the overall footprint of the gear to determine the size base needed. It ended up being 12 x 16 inches. A couple cardboard mock ups were made and I played with using an elevated shelf design to keep the overall footprint smaller.
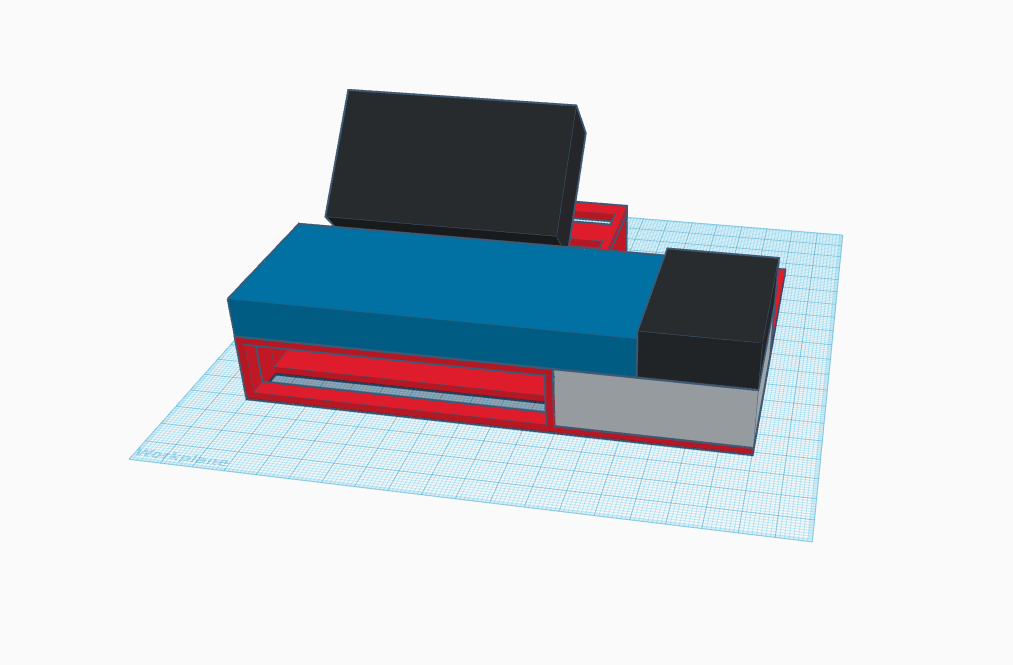
Once I was happy with the cardboard mockup I went to work creating a base in Tinkercad. This is an easy to use free 3d modeling tool that outputs to the .stl file format used for 3d printing. The base design was slatted to reduce the overall weight/material required and had a gap area where peripherals/batteries could be placed.
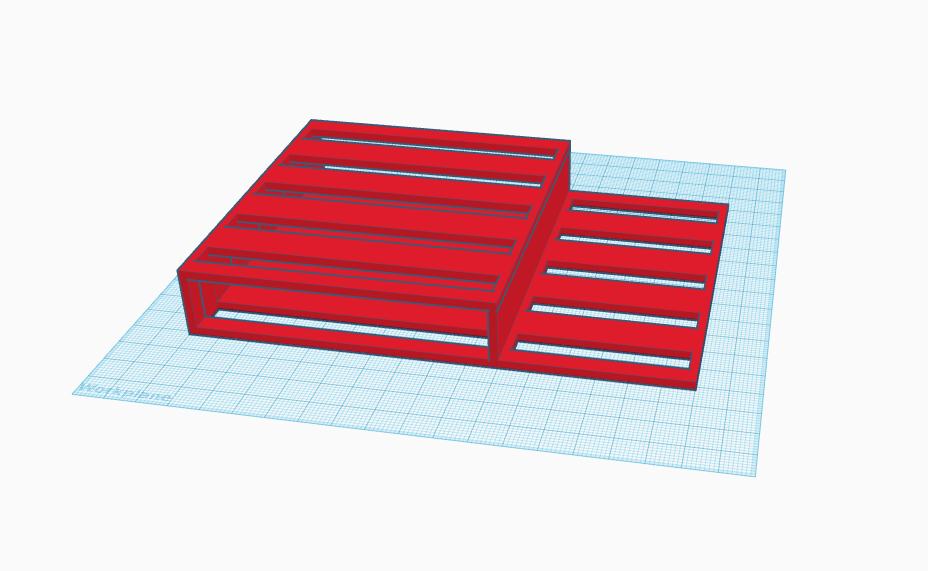
And below is a mock up of what the hardware was going to look like mounted on top of the base.
After sending the above files off to a co worker that has a 3d printer it was determined the design was going to be a pain to print due to it’s size. Additionally, it probably wasn’t going to be sturdy enough. They modified the design to be solid instead of slatted and sliced it into smaller pieces for easier printing. The print medium used was ABS plastic. All I had to do was glue the pieces together with some super glue. The actual hardware was fastened to the base using 3M Dual Lock Velcro.
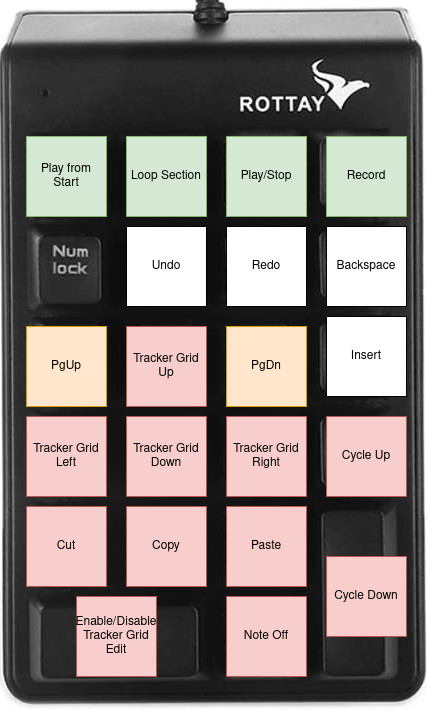
Numpad mapping
SunVox has very robust touch controls. That being said I wanted some physical buttons.
- Quickly access commonly used functions that are buried in the hamburger menu
- Tactile clicky buttons feel nice
Battery life and thermals
The Pi 4 draws much more power than previous generations. I used the information in this helpful comparison of the power draw for all the different models to get a ballpark estimate of what would be required by the build. The 7 inch display has a constant power draw at max brightness so that was easy. This allowed me to get the following values:
| Component | Idle (mA) | Peak (mA) |
| Raspberry Pi 4 | 575 | 885 |
| 7in Pi Display | 460 | 460 |
The other peripherals (MIDI keyboard, number pad, audio interface) didn’t have their power draw published anywhere. With everything hooked up while on the official power supply it ran without issue. The results when using a cheap battery bank that could output a max of 2.1A were interesting. Not only was the lightning bolt icon displayed in the top right hand corner of the screen displayed, but the Pi CPU was throttled heavily due to the deficient amperage being received. I conducted a battery drain test and got the following results.
- Large MODEP patch loaded
- Large SunVox session playing back on a loop
- Wifi enabled, Bluetooth disabled
- Screen at full brightness
| Battery bank capacity: 4400maH |
| 2.1A max output |
| Total Run Time: 2h, 38 min |
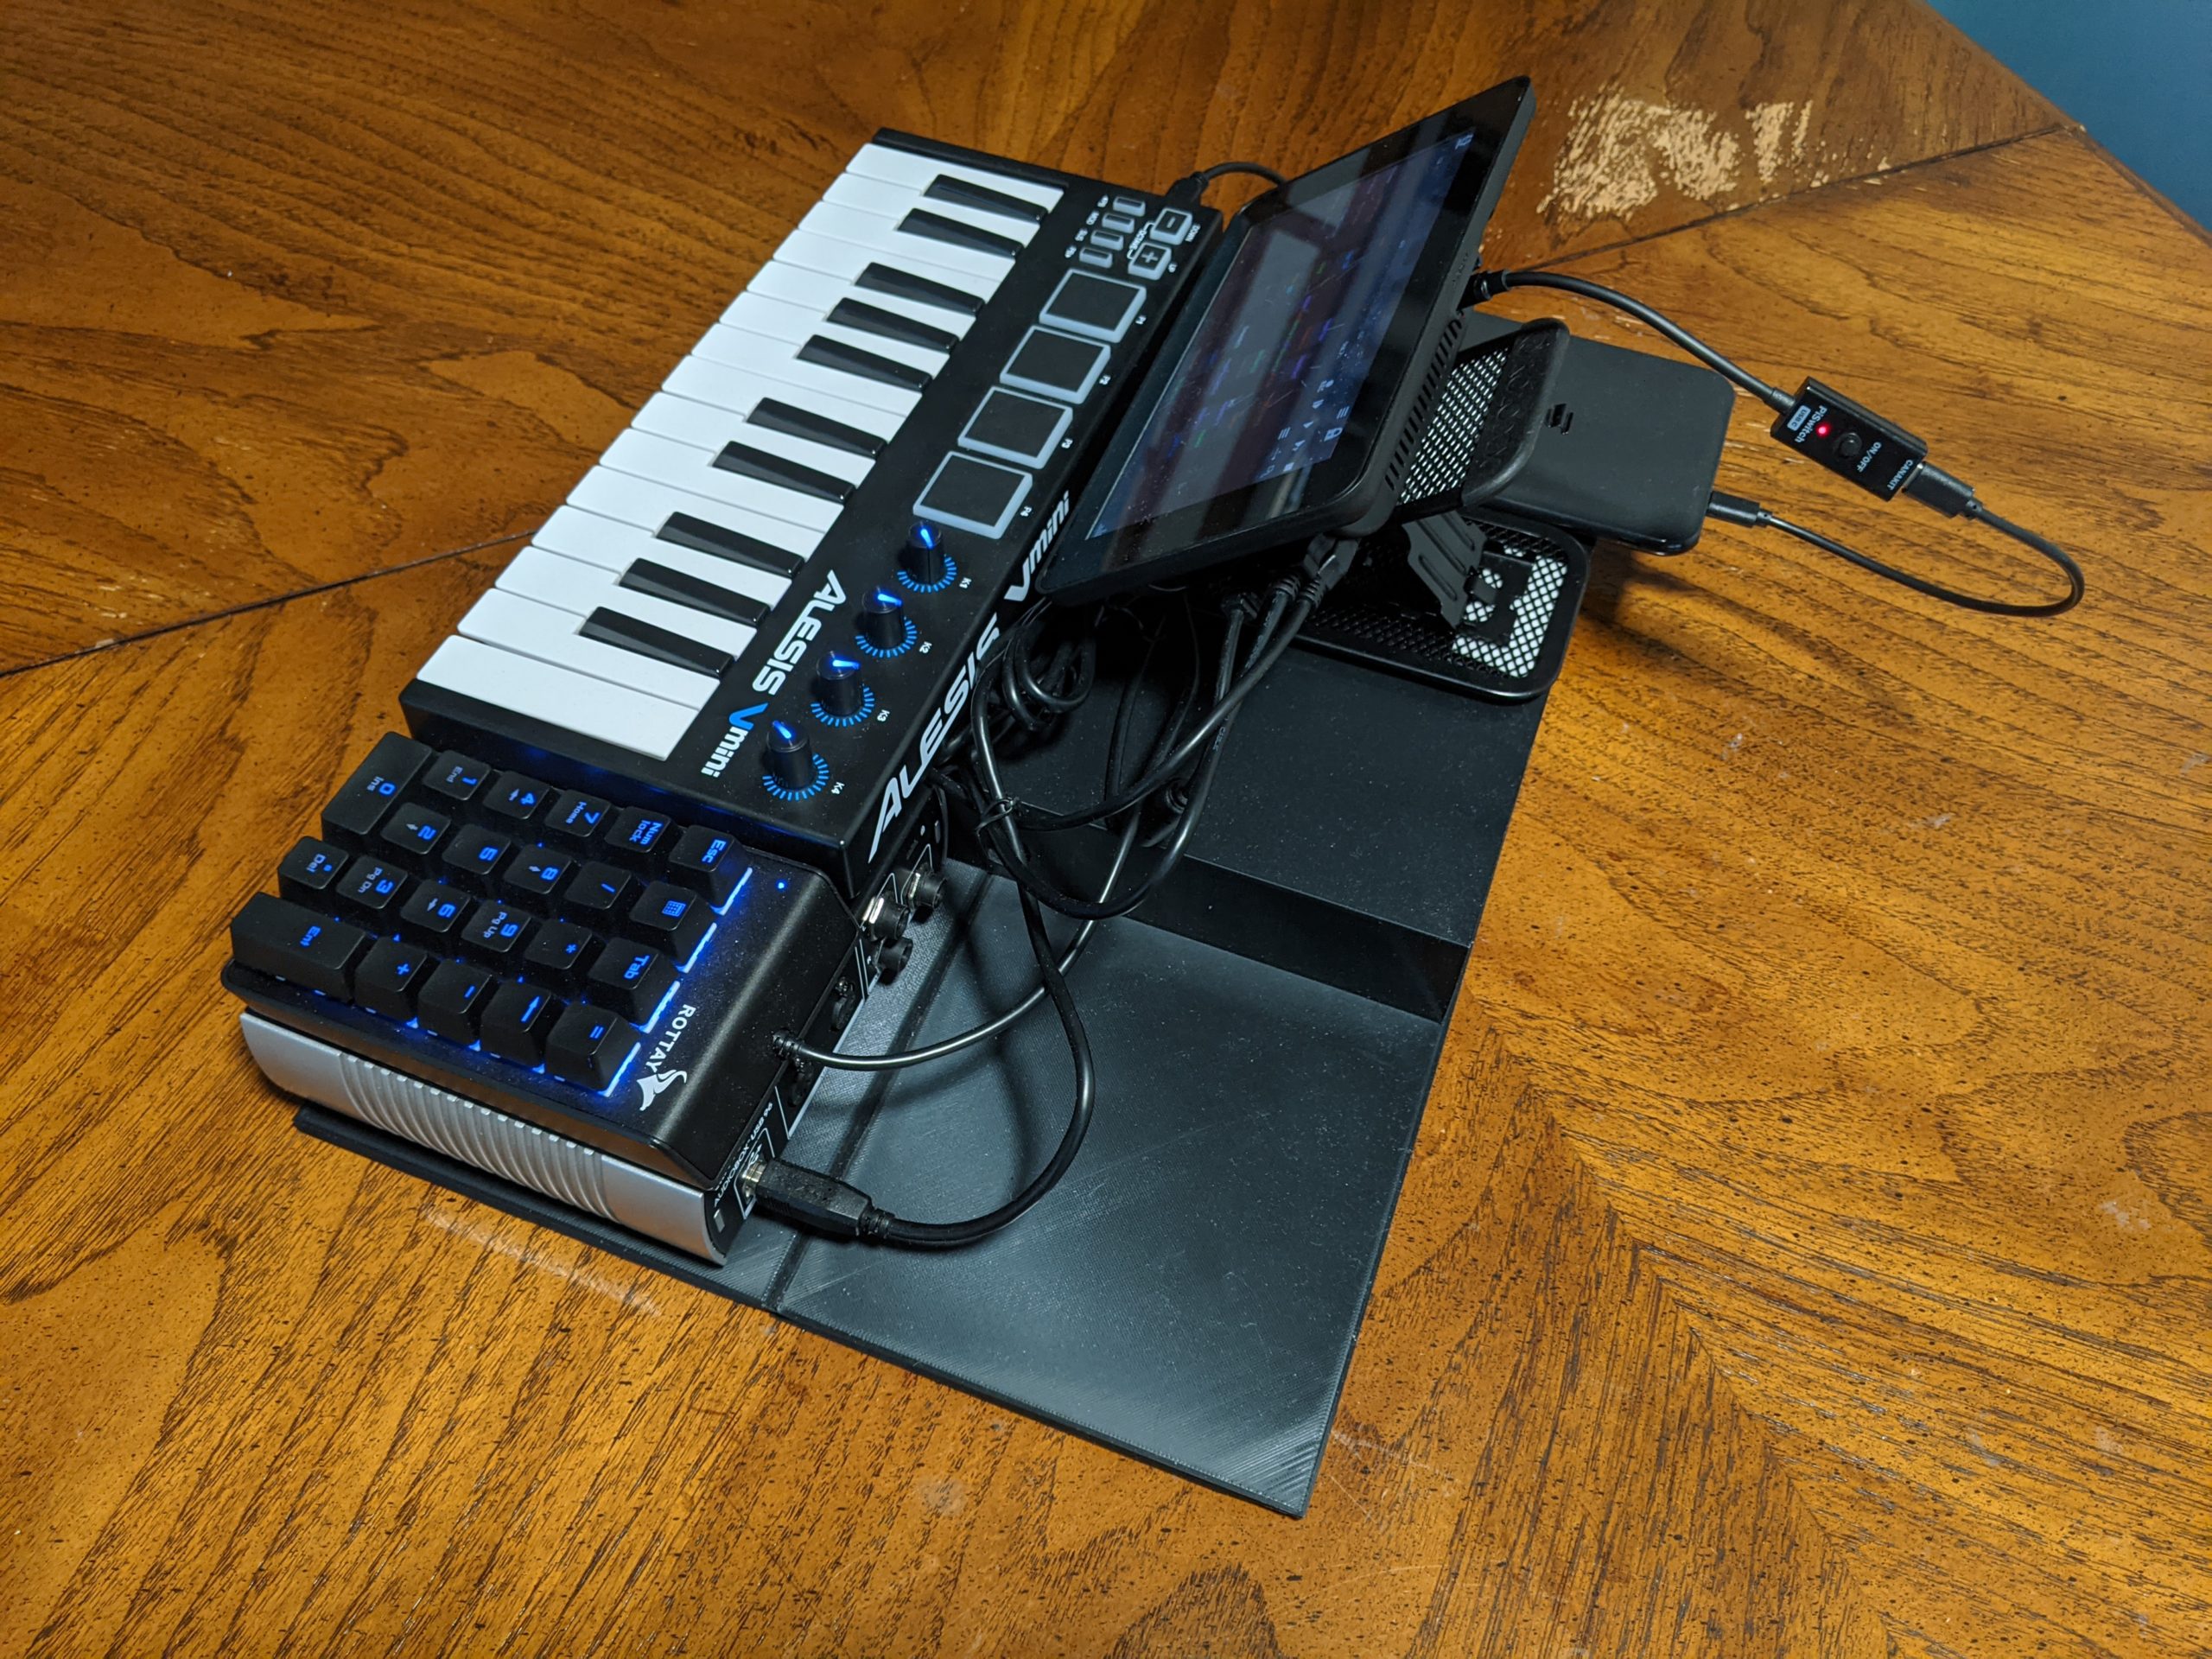
Another factor to consider is that the USB-C cable being used with the power bank must also be rated to carry 3A. Many are not. A lot of the ones that claim to handle it in their specs actually don’t. Thankfully the Charmast supply I found provides a cable that can handle the 3A output by the bank. I ran some load testing by hooking up all the peripherals and running a large MODEP/SunVox session. Everything ran fine with no lightning bolt or CPU throttling. I also lowered the overall display brightness from 100% to 70%. This not only increases the run time of the unit but also prevents me from being blinded by the display in a dark venue. This is done by running the following command where n is a value between 0-255:
echo n > /sys/class/backlight/rpi_backlight/brightnessBy extrapolating from my above battery drain test I can estimate that the unit can achieve a run time of at least 16 hours, though I’ve yet to actually do a full drain.
he MODEP/SunVox stress tests were run again and the temperature checked via the command line using:
/opt/vc/bin/vcgencmd measure_tempThe above outputs the temperature as Celsius. This test was conducted indoors with an ambient temperature of around 65F/18C. In this environment when under load I am seeing an average temperature of 75C. The Pi 4B will begin throttling due to temperature at 80C.
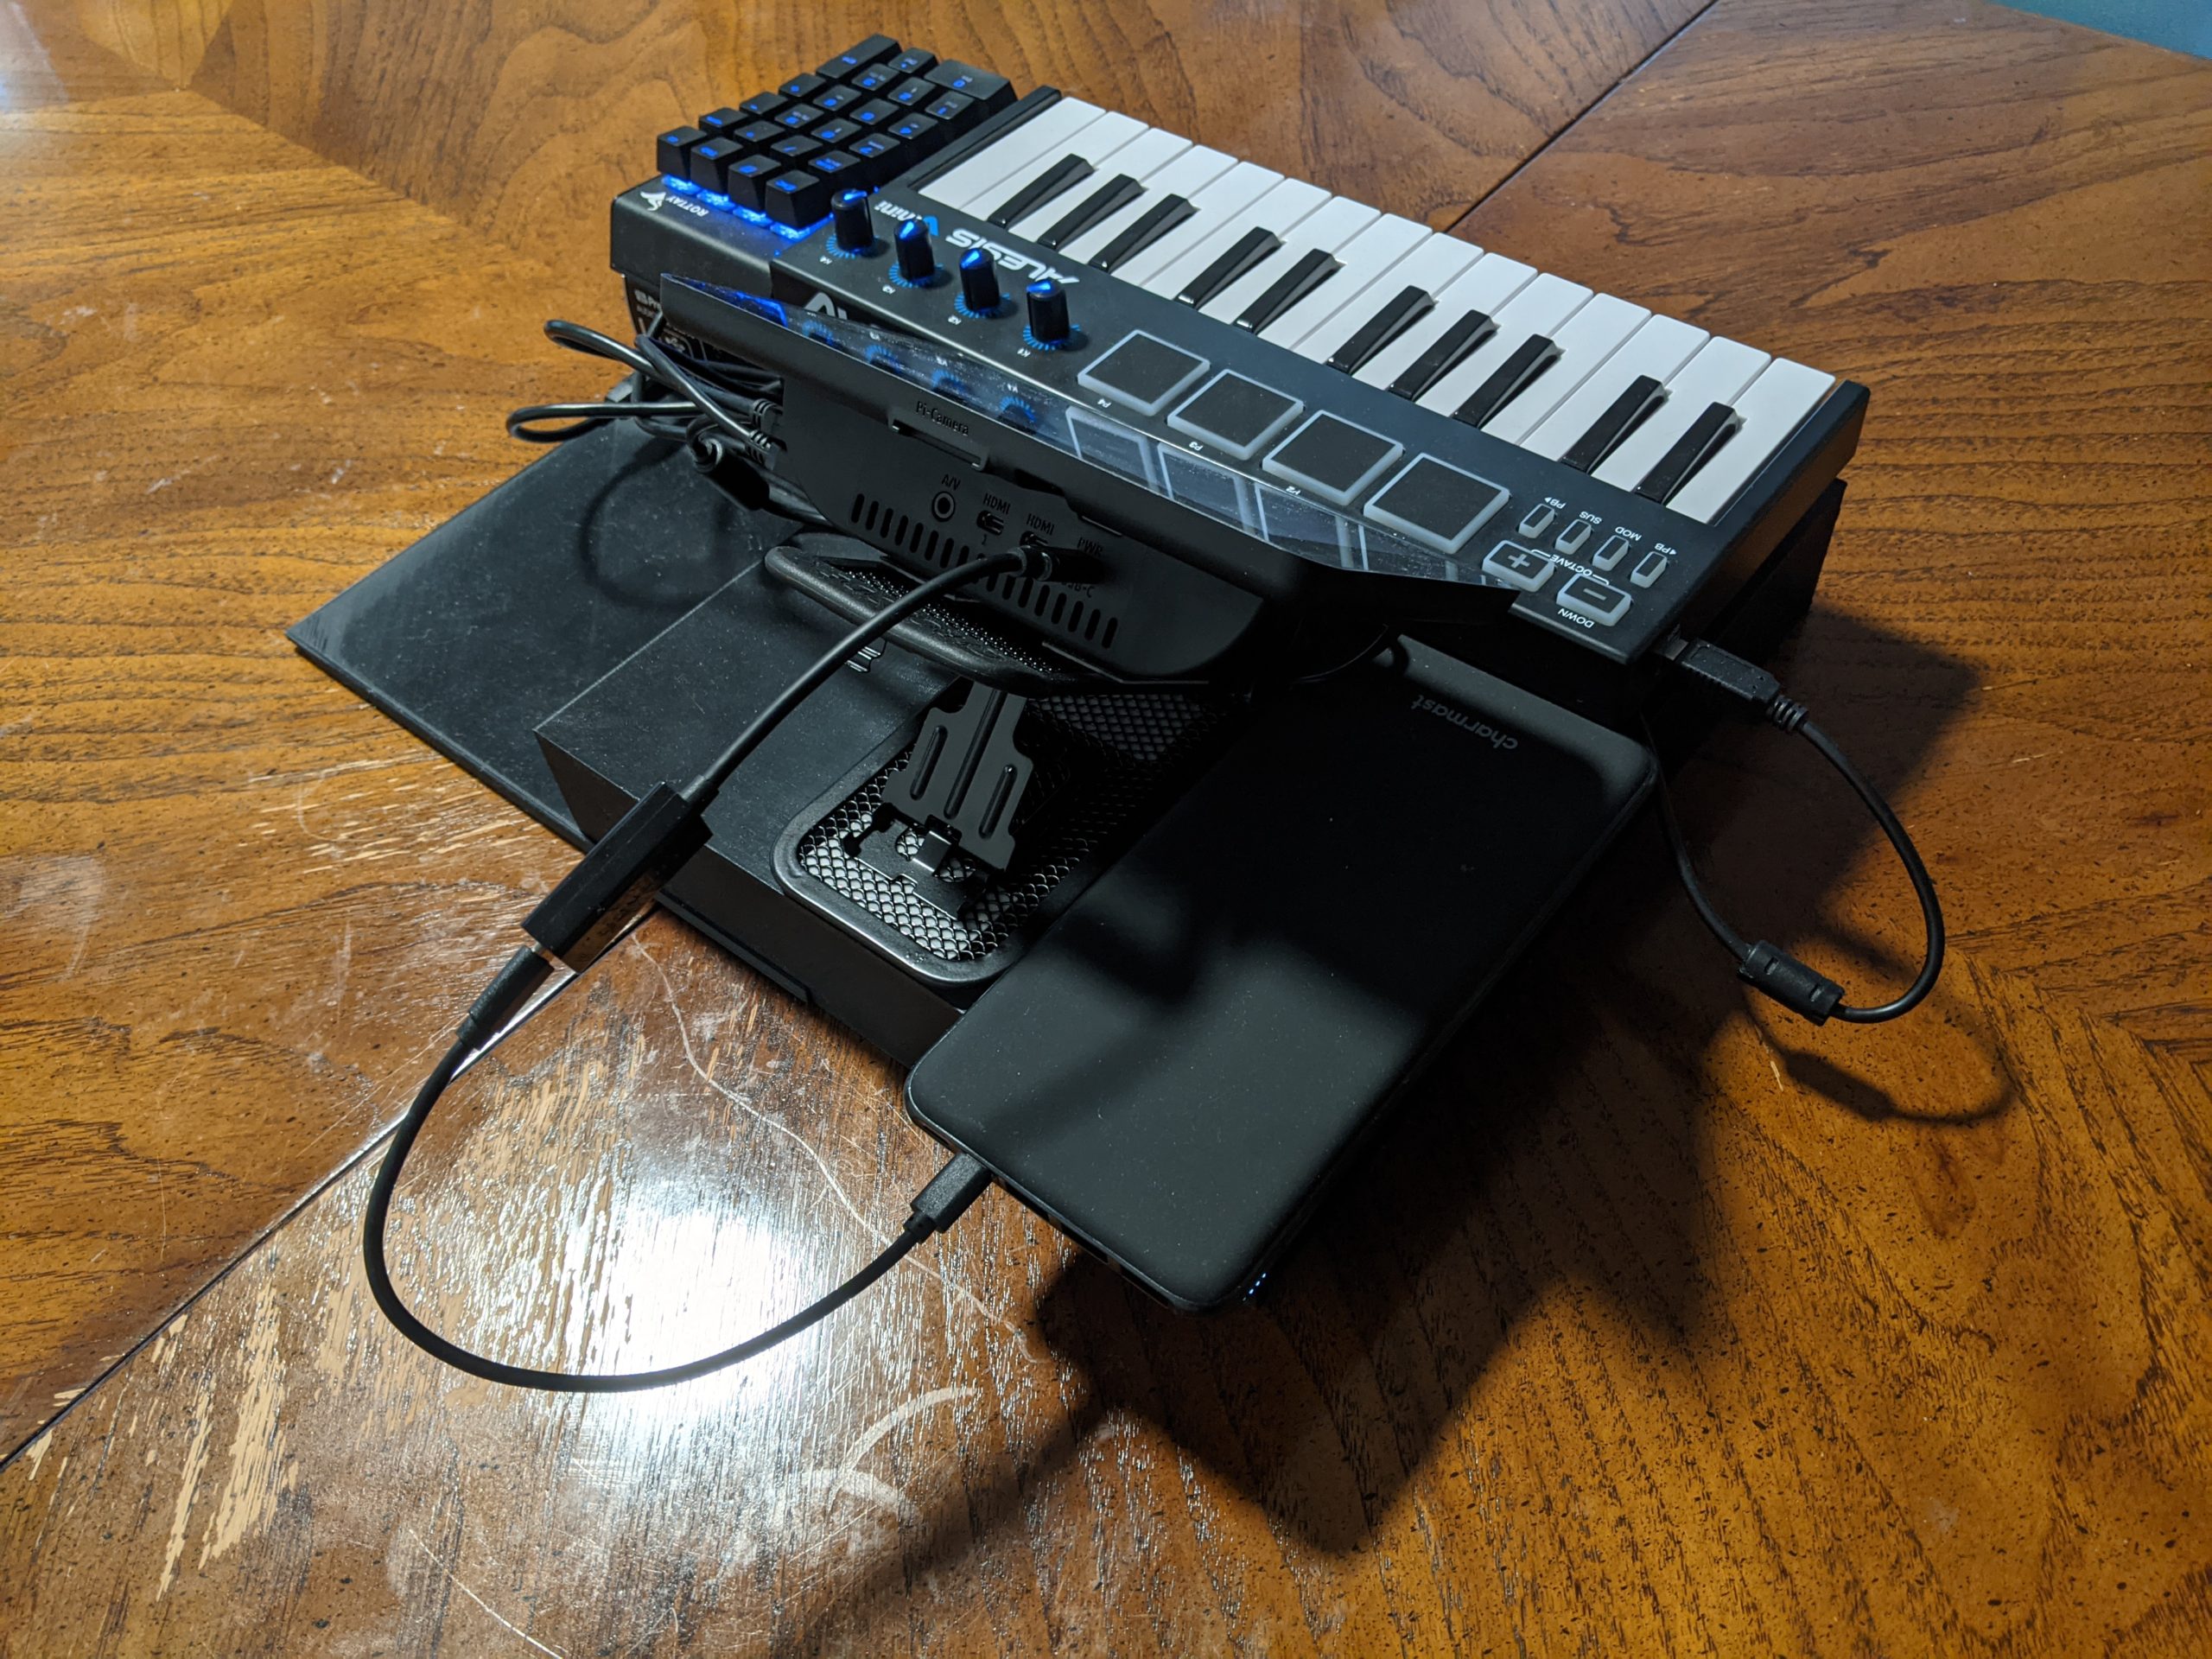
To give the unit more thermal headroom (in case I play some outdoor summer shows or in an especially hot venue) I ordered and installed a low profile heat sink with fan. It fit within the NeeGo case with plenty of leftover headroom. The fan just about lines up with the cutout logo on the back plate which allows air to pass through freely. The only difficulty that I ran into was that the plastic power plug for the fan was quite large and wouldn’t fit comfortable next to the other connections on the GPIO pins for the screen. This was resolved by snipping off the plug and soldering directly to the appropriate positive and negative pins directly. With this unit installed the temperature was reduced to 60C, a reduction of 15C.